Object contextual menu
Pressed over an atom or a bond the right button opens the object contextual menu:
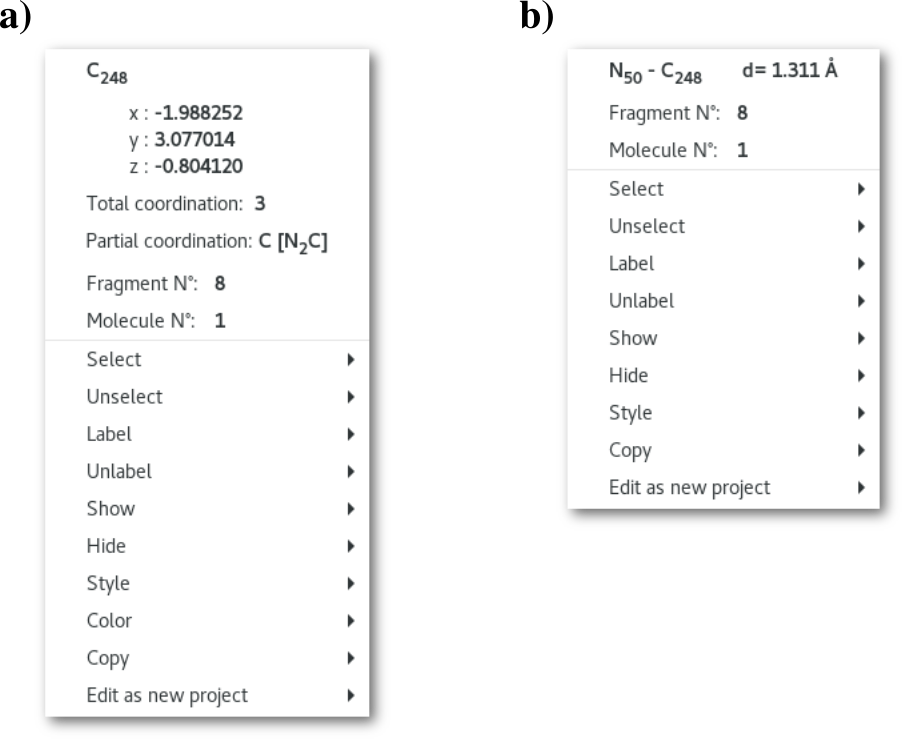
Over An atom: the menu in figure 5.21-a) is displayed, the top part provides several information (when available) related to the atom:
The atom id: chemical species and id number in the project
The atom coordinates
Total coordination of the atom
Partial coordination of the atom
Fragment and molecule id the atom belongs to
Over A chemical bond: the menu in figure 5.21-b) is displayed, the top part provides several information (when available) related to the bond:
The atoms involved in the bond
The bond length
Fragment and molecule id the bond belongs to
The bottom parts of the object contextual menus in figure 5.21 are almost identical, and contain a list of submenus dedicated to several actions that could be performed in relation to the object, atom or chemical bond, of the contextual menu. The construction of each submenu follow a similar pattern presented bellow.
Construction of the submenus
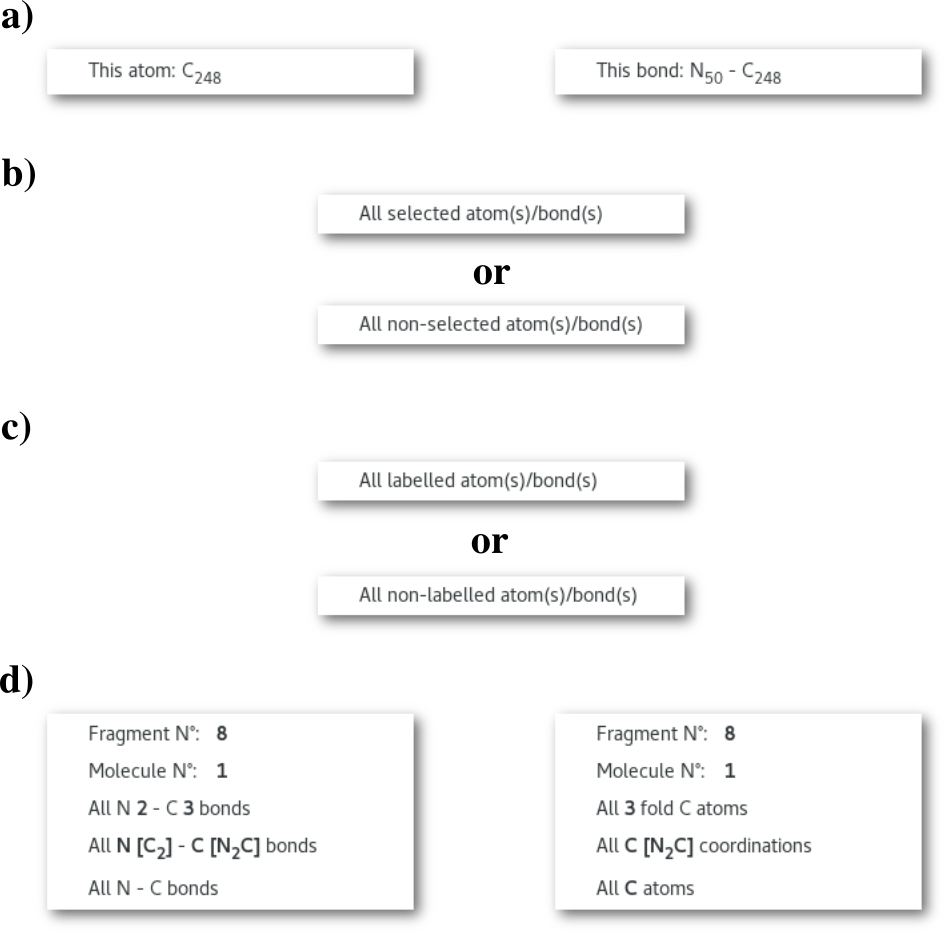
If the action proposed by the submenu can be applied to this atom/bond then the first element of the menu is a line with the name of this atom/bond [Fig. 5.22-a]. The second line [Fig. 5.22-b] refers, depending on the action of the submenu and/or the status of the atom, to "selected" or "non-selected" atoms. The third line [Fig. 5.22-c] follows the same idea for the "labelled" or "non-labelled" atoms. Finally the bottom part [Fig. 5.22-c] refers to the coordinations and the chemistry of the considered object.
Most of the actions provided by these submenus being very intuitive, only the "Style" and "Edit as new project" menus will be introduced in detail thereafter.
The "Style" submenu
The "Style" submenu(s) of the object contextual menu allows to change the visual style locally, ie. for an atom/bond, or any particular set of atom and bonds in the model.
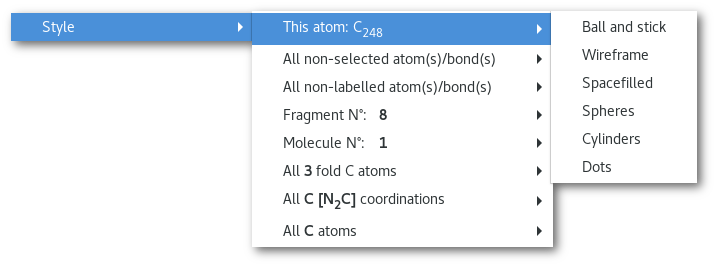
Overall using local style(s) allows to improve the visual representation and to highlights particular element(s) [Fig. 5.24].

The parameters of the local style(s), are inherited from the global style (see section 5.1.1.1). Therefore in order to modify any parameters of a particular style, ie. the sphere radius of an atom for the "Ball and stick" style, this style must be applied globally, and the appropriate parameters modified using the "model" menu (see section 5.1.2) or the "Atom(s) configuration" dialog (Fig. 5.6). Afterwards and when applied locally the "Ball and stick" style will use the new parameters. Note that the default atomic radius for the "Spacefilled" style, even is this style is not used, is the "Covalent" radius, following the local style menu's behavior and if the global "Spacefilled" style was not changed, then the local "Spacefilled" style(s) will use the same parameters.
The "Copy" submenu
The "Copy" submenu(s) of the object contextual menu allows to copy atomic coordinates, the copied data could then be re-used either using the "Model edition" dialog (see section 6.1.3) or the mouse "Edition mode" (see section 6.2).
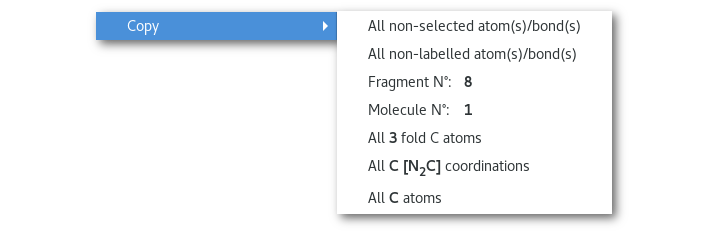
Data can copied from any project, even from an MD trajectory however in that case only the atomic coordinates from the visible MD step will be copied, other will be ignored. Data can only be pasted in project(s) that support the "Edition mode" (see chapter 6).
The "Edit as new project" submenu
The "Edit as new project" submenu(s) of the object contextual menu allows to create a new project using any particular set of atom and bonds in the model.
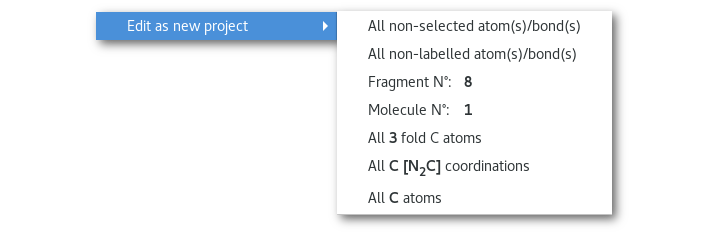
Using any button of this menu the corresponding set of atom(s)/bond(s) will be copied and exported as a new Atomes project. This new project will immediately be inserted in the workspace tree to be available for further work and a corresponding 3D window will pop-up. Parameters of the initial project will be applied to the new one (style, colors ...), except for the periodicity, if any, that will be lost in the process.
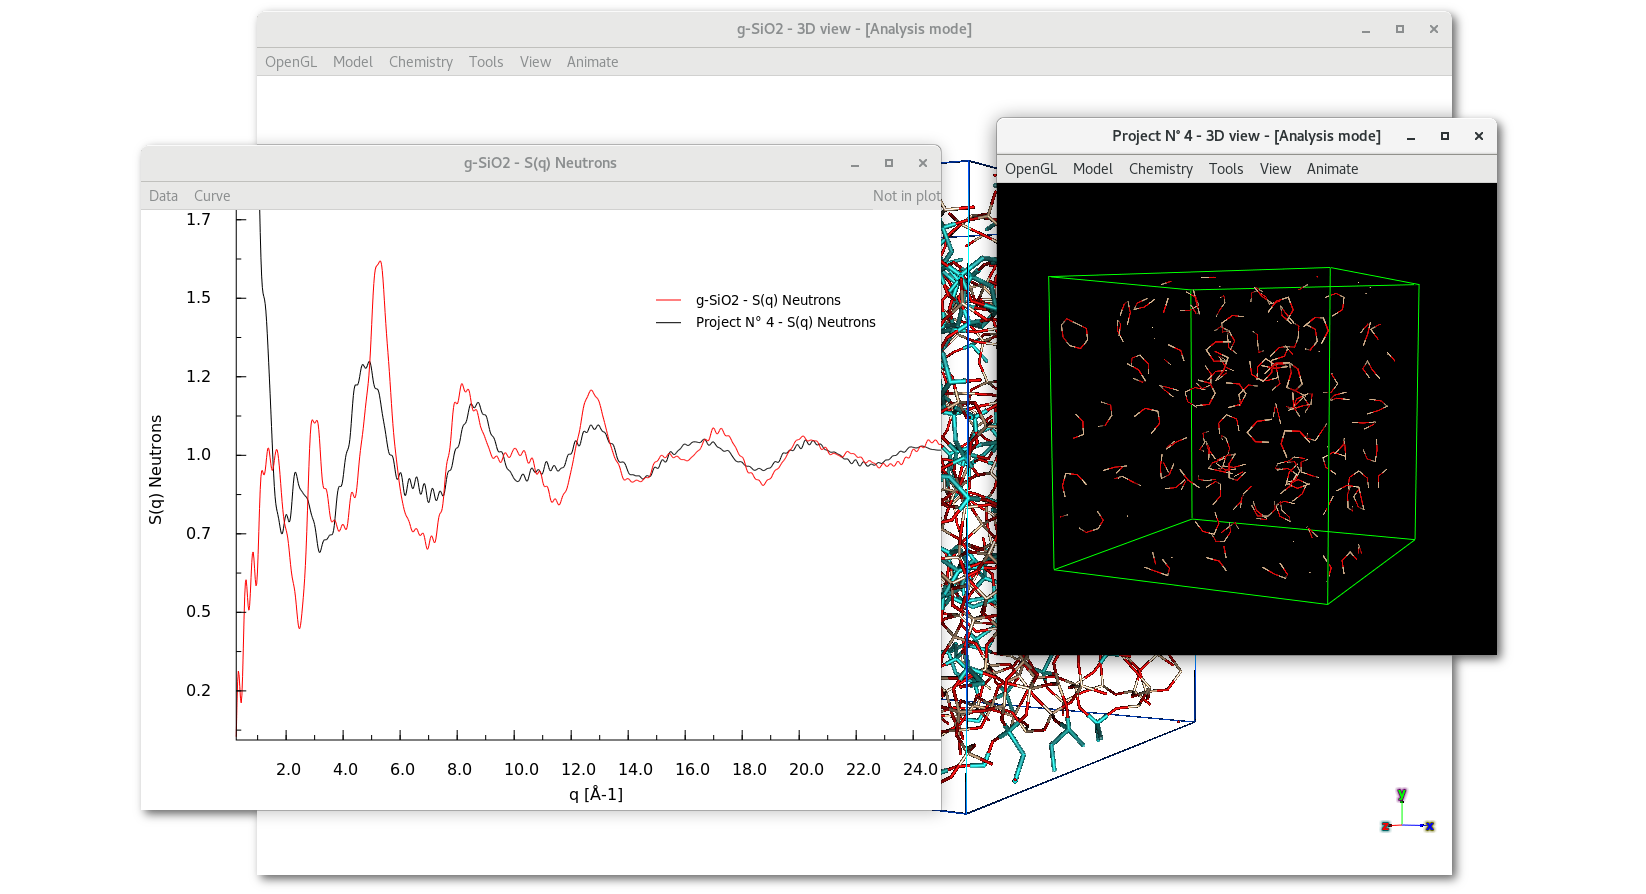
An example is proposed thereafter:
For this example the King's rings statistics analysis (see section 5.5) was performed on SiO
Advanced environment" dialog was opened and all atom(s) involved in ring(s) of size 6 atoms were selected (selection is highlighted in light blue):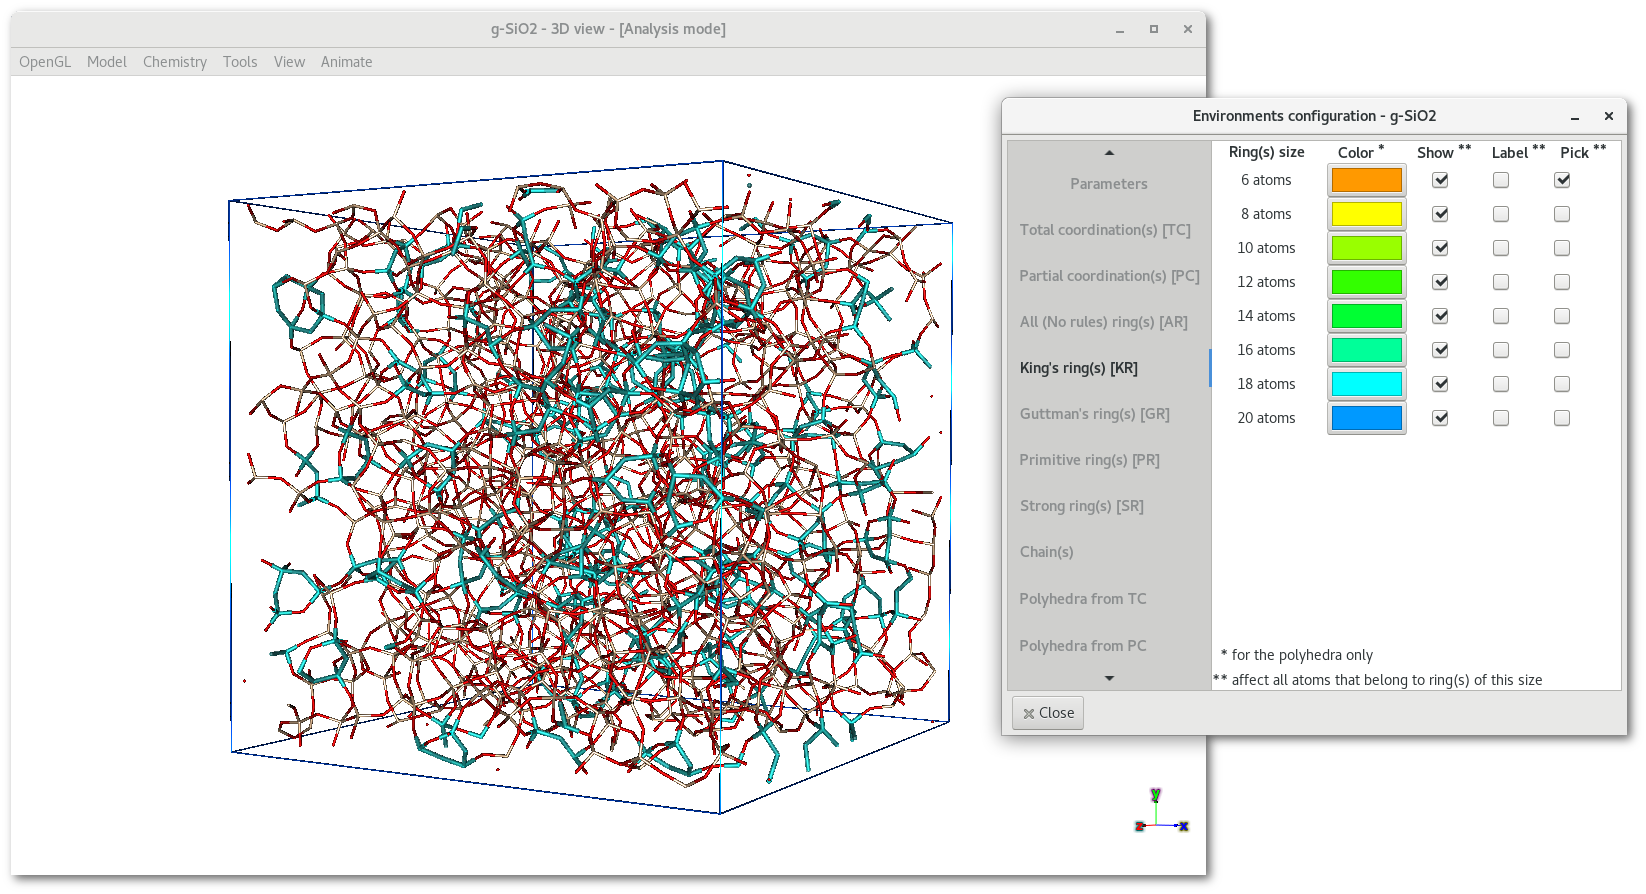
After the selection, the object contextual menu is used to "
Edit as new project" the list of "All selected atom(s)/bond(s)":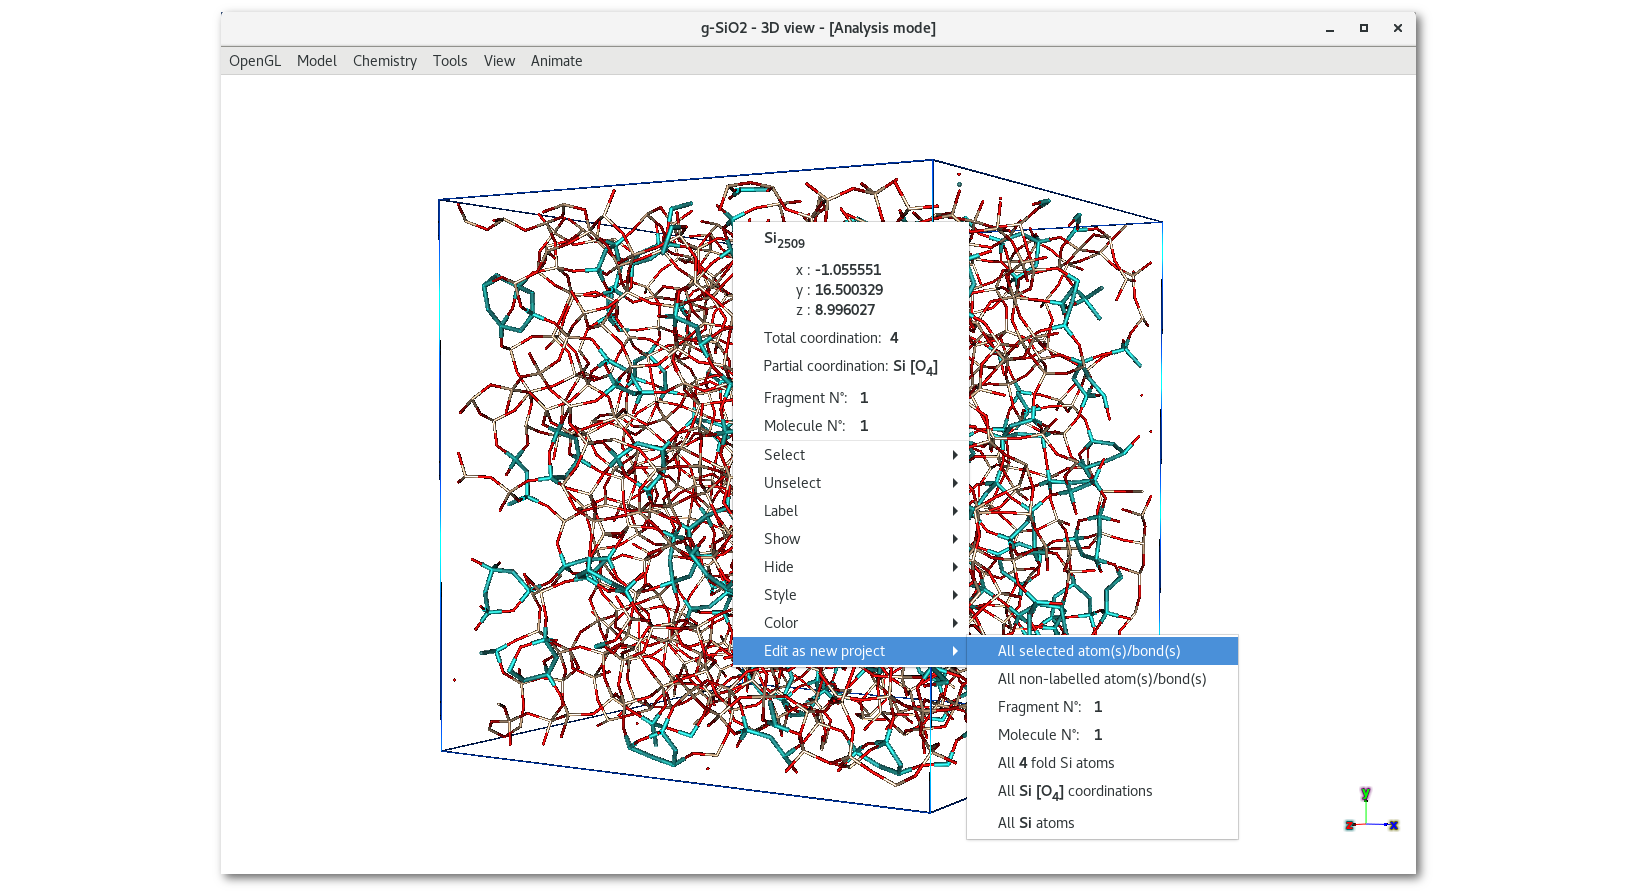
The new project "
Project N°4" that contains the appropriate atom(s)/bond(s) is created and inserted in the workspace tree, and the new OpenGL window pops up: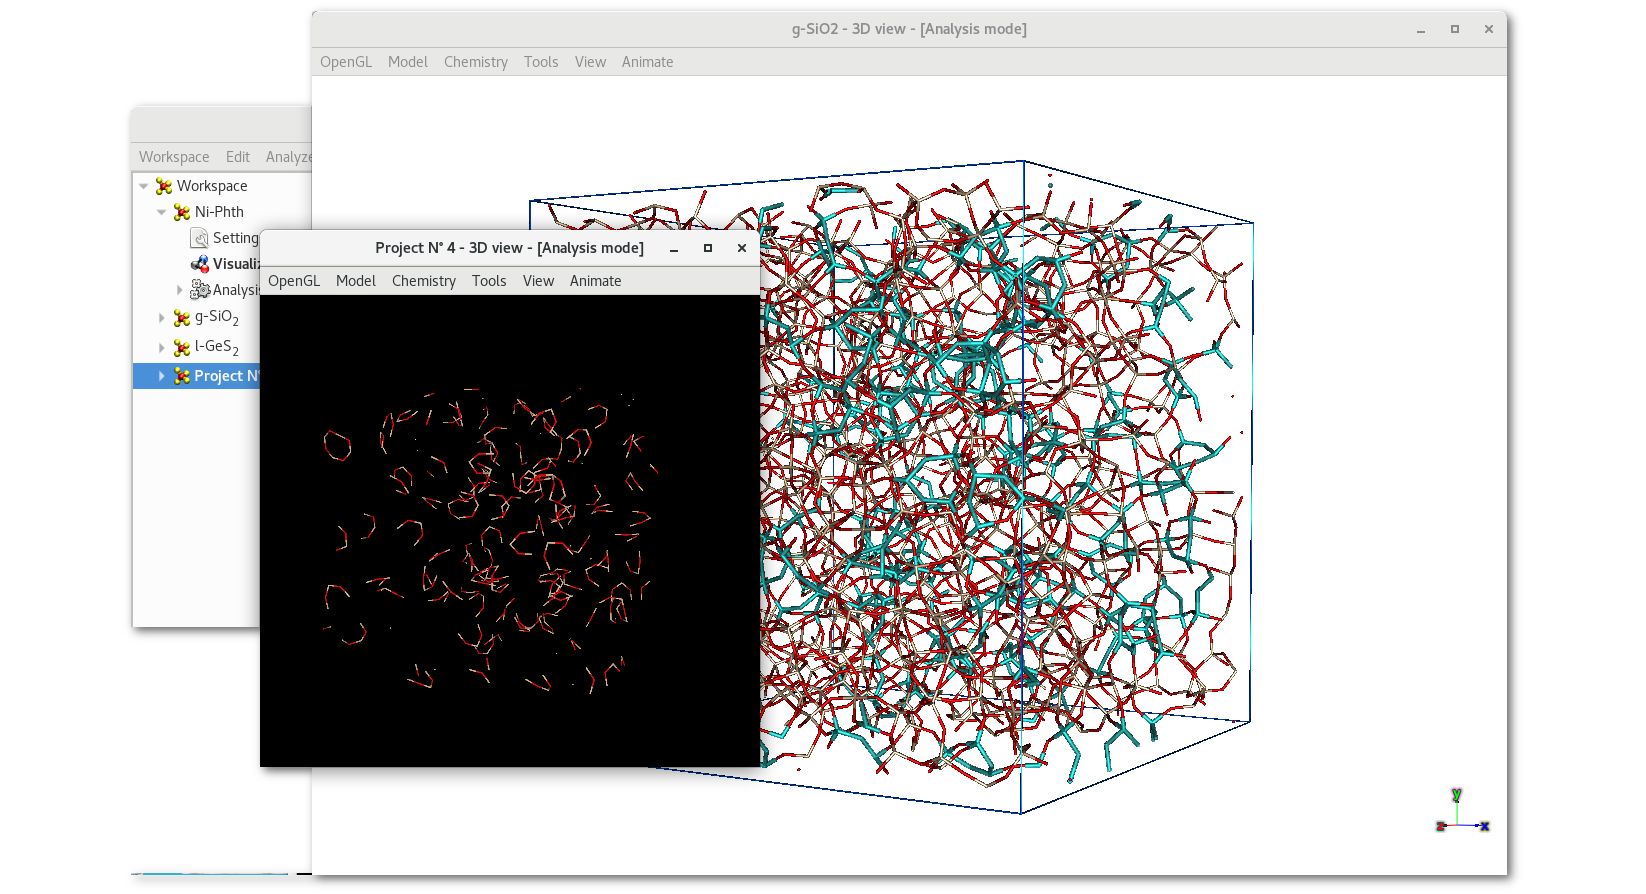
Finally after restoring the periodicity, it is possible to calculate any other properties for the new model, ie. the selection from the SiO